For assignment two, we have been given the task of creating a video (moving image) along with still images to go with the footage we record. The assignment is designed to add to our pre-existing photographic skills and introduce the new step to the digital age of technology.
During this term, we will be given basic skills instruction workshops to learn how to work the Canon 5D Mark II to record footage and export into systems ready for editing. We will also be given skills instructions for using Adobe Premiere CS6, which is an editing software to create your own moving imagery.
With this assignment we need to make sure we present our research clearly and document the progress onto our blogs so that the development is visible to anyone reading the blog. Chart the ideas, research, script, storyboards and comparisons to other contemporary practioners working in the same way.
By using one of the themes given to use in this assignment, I need to look at how I could create such a video poetically and visually pleasing to watch and consider the creativity.
Given themes:
- A successful small business
- Personal hobbies – the need for a balanced work life
- An inspirational person
- A personal obsession
This assignment will also help to give me skills to work with moving image as well as still photographs that I’m used to taking. The film should be poetical like I mentioned earlier, and doesn’t have to be formal, as long as the piece puts your theme across.
Ideas Blast
After looking at the brief and themes, I went away and started to create mind maps on the themes I liked most and which I thought we more applicable to me. I chose to look at a personal obsession and a hobby.


Deciding on the Final Theme
I made a final decision on which theme to use, and I thought the hobby would be the best because this is what I do at uni currently in-between working on my assignments. I use my time to work and have personal time to draw and improve on my skills so this is what I want to represent in my short film. I then went away to research what exactly is a hobby and what does it mean to me.
What is a hobby?
A hobby is an activity that you enjoy to do, and undertake regularly. You get pleasure from the activity and are considered a leisure time. Hobbies could be a variety of different things. These can very between collecting objects, playing sports, music, art and crafts and many more. There’s so much to choose from. By having a hobby and undergoing it for a long time you can get a lot of knowledge of the subject. The different between a hobby and professional is that a hobbyist does the activity solely for fun whereas a professional engages in the activity for pay. However, this does not mean the hobbyist is any less skilled that an professional.
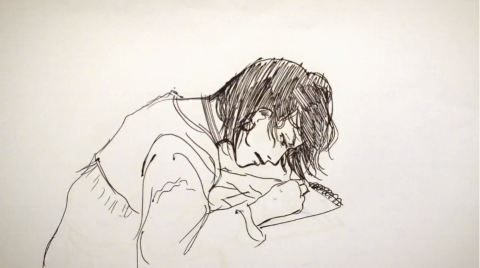
I have a wide list of hobbies that I like to undertake, but my favourite is to draw. It passes time and helps me express my own emotions. Not only does it help me mentally, it also fills me with job and happiness when I draw something that I am proud of, something could show off to friends. I’ve been drawing since I was a very young age and have done many art courses over the period of time, both undertaking it for personal gain as well as for educational purposes. I like the feeling of having an end product that I can keep and the process that I took to get to that.
Here is some of my work:


So, why do I draw?
I mainly draw to keep my mind rested and settled. Having so many thoughts, feelings and ideas in your head get jumbled up so I just put pencil to paper and start to draw and even use Photoshop to enhance my drawings because I like to learn new skills. Drawing is another way to communicate to somebody, especially with how you feel. I always thought that drawing was the only thing I was good at so I continue to improve my skills and it makes me proud.
What I want to achieve with my video?
With my video, I want to create it so that it looks energetic and pleasing to physically create something. I want to try and make an inspiring video that makes people want to draw themselves. I’m not sure how I’m going to achieve this yet but I want to record the process of creating art.
Research into Still Photographers
Dryden Goodwin
Whilst doing research for this, I came across this artist who uses photography and video recording to show off his art work. Here is some of his work:


http://www.drydengoodwin.com/mould_prints_2011.htm
 http://www.drydengoodwin.com/william.htm
The way that Goodwin has used photography to capture his art work I think gives a new definition for them and enhancing them. The use of composition on some of his work gives it a new sense of purpose and not only do you see the art but also the photography that it used to portray it. I think you have two pieces with his work, you have the physical element that he has created and then the photograph which is another form of art.
David Welch
Welch is a fine art photographer who explores social issues whilst using photography to capture his art work. The use of photography to capture art work gives it a whole other purpose, not only to be seen physically but it’s easy to contribute amongst people if it’s in photograph form.


 http://leftfork.net/material-world/
Ben Heine
The way that Heine has use photography and art together to create a new outcome amazes me, his work is fresh and interesting to look at. The use of drawing an image and placing it over a photograph to create a new picture makes me feel motivated to do art work, and that’s what I like about his idea of working. Not only does he do drawings with photography, but also digital work so there’s a mixed variety such as my own work.


http://www.benheine.com/projects.php?dossier=72157623723956821
The use of Pencil Vs Camera is interesting because i’m going to use my film to show off my work.
After looking at Heine’s art work, I noticed that he also had videos so I went to check them out and there was one inparticular that stuck out to me.
The way that this was filmed and produced is so calming and very informative at the same time. Even though I don’t want my video to have audio because I want it to be a musical piece to go with the drawing that I created. I liked the visual elements to this video also because the different use of angles, vantage points and focal points were different and the music worked so well with the piece. It was calm, soothing and showed an understanding of a passion for art work.
Video Research
Now that I have sorted out what I want to film for this video, I have used the internet as a resource to find other videos that I could use to influence my own film. I’ve used websites such as Youtube and Vimeo to collect the resources I have used. Whilst watching these videos, I have tried to pick out parts of the video that I like and want to recreate in my own film.
Click image to view full video on Vimeo
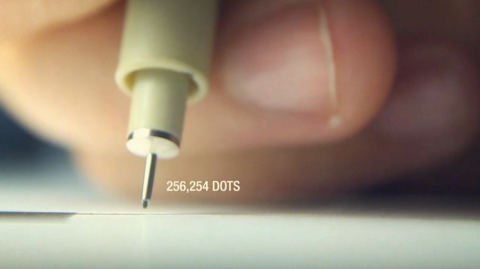
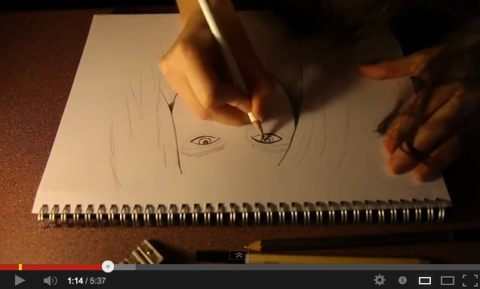
I absolutely love how this video has been filmed, the compositions and use of focussing really brings your eye into the drawing. The beginning gives you an introduction on what is going to be happening and is all delicate, which later on becomes more aggressive as the work because more strenuous. The first frame is a blank piece of paper and the middle of the story is the development of how the drawing goes, with the end shot being the finished product.
Click image to view full video on Vimeo
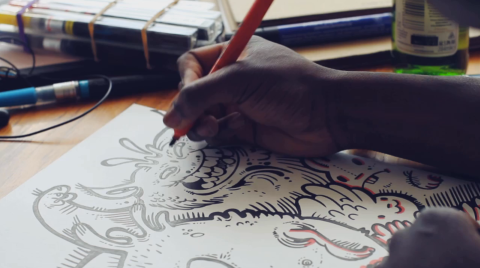
This next video I like because of the use of composition also, the way the camera is situated over the shoulder and at different angles of the paper to video detail being drawn on the image.
Whilst looking at these videos, I always noticed that they had no audio and a piece of music over the top playing which was either very soft or very quickly paced to go with the speed of the video. This is what I want to achieve with my own film.

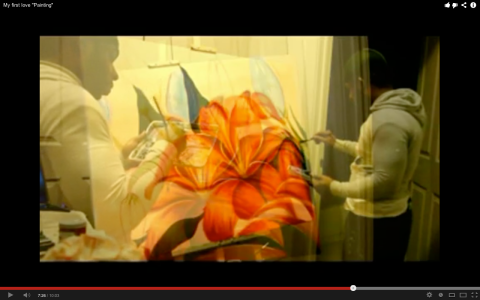
Click image to view full video on Vimeo
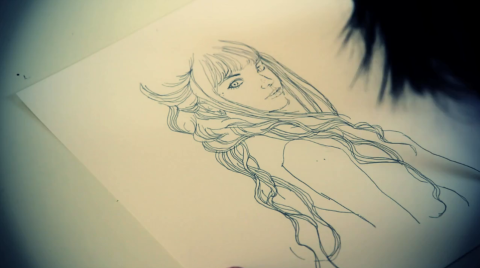
This next video I found on Vimeo was one of my favourites. The attention to detail that was recorded in this really gave it depth and showed a real emotion whilst drawing. The beginning and end was particularly good because I like how it started with a blank page and gradually saw the transformation of the image. This is similar to what I want to achieve with my video. The tone of the image goes with the image too, and composition was always spot on I believe. Even though there was no introduction, you knew what the video would be about with it’s title and the images shown on screen. I want my video to be obvious that it’s about drawing and to engage people into the creation.
Click image to view full video on Vimeo
The angles and shot in this video were interesting and gave you up close views of the detail in the image. I felt like this guy was really in his own world drawing surrounded by all the things he loved and used to draw and create art. The relaxed feeling about the video, as they shot a bottle of beer just makes the whole thing chilled, as if it’s time out.
Click image to view full video on Vimeo
Even though this isn’t a recorded video, it is still interesting to watch as it is an animation. The animation is well done and shows the different ways you could draw. The visual element is fascinating to watch to see what kind of image is next and it makes you want to watch until the very end. It doesn’t appear to become repetitive and boring.
Click image to view full video on Youtube
This video was very nice and and the use of fading into another frame was nice because it overlapped the images to reveal another shot. This is better than fading a frame to black, not only do I not like this way of working but the black fade symbolises another chapter to the video so it would become inappropriate to add it in.

Click image to view full video on Vimeo
Just to put in a bad example into my work, I didn’t like this last video because I thought it was bland and boring with just the same shot repeated over and over again.
From these videos, I’ve learnt that within my own video I need to make sure that I make it visually different and not have the same shots playing for too long otherwise people will become bored. I need to mix up the use of still images and recording. I also need to consider finding music for my video which will work well with the fast pace of the clips I’m going to use.
Canon 5D Introduction
These cameras were very new to me, but it was interesting to learn about them. The first thing we were taught was the basics on how to turn it on, use the menu and learn the settings we need to actually recording. We recording you have to make sure the video is on 25fps, which is how many frames it takes in a second and the frame size would be 1920×1080. You can use 24fps which is more cinematic with a frame size of 1920×1080 but for this purpose I’m sticking to 25fps. When recording, you can record the sound with the camera but it’s very fuzzy and poor quality which wouldn’t do for creating a film. So you have to use a separate device called an Edirol.
Before recording, you must make sure that the card is formatted to get rid of anyone else’s settings and that there is plenty of memory on the card for you to use. Then you can pick your camera settings as you would with any other camera. The white balance can usually stay on auto but you can change this if you wish too. However, if you created a video that was to ‘orange’ or ‘warm’ because the white balance was off, it’s easier to ‘cool things down’ in post-procution that to heat them up, so you should slightly ‘over-warm’ your images.
Once you have set your camera up, it’s best to use a tripod when recording because then there is no jitter to the image but if you have a good stance, keeping your legs and feet firm you can use your body as a guide. This way you have good camera control.
Editing for the first time in Adobe Premiere CS6
In this short workshop we learnt how to put together videos and edit them using Premiere, which was a completely new experience for me as I had never used this software before. At first it was overwhelming on how to actually use the software, but having gone out and done a few short clips of footage with the Canon 5D, and taken still images, I was able to put these into the software and create a short clip out of them.
The easiest way to work with Premiere was to create a folder on your desktop and add in all the data (images, video clips, music, etc) into this folder so it’s easily accessible. Below is the setup frames for Premiere:
1. Opening screen, click on ‘New Project’

2. Check settings and give a name to sequence and click ‘OK’

3. When creating the video, make sure the setting DSLR 1080p25 is checked, if you’ve taken images and video clips in this setting.
4. Then once set up, you will be presented with this screen and are ready to add media and create your video.
When editing the footage to add in, you use the ‘mark in’, ‘make out’ system, this selects the beginning and end of the video clip you want to use. The space bar can be used to stop and start the video, K to fast forward, J to rewind. Once happy with the selected part of the video, drag and drop onto the timeline on the bottom right hand side. Once you have a few pieces in the timeline you can overlap, drag and drop, cut out parts and do what you wish with the footage to get it how you want it.
Here is a small clip that I created using Premiere as a trial:
Click image to view video on Youtube
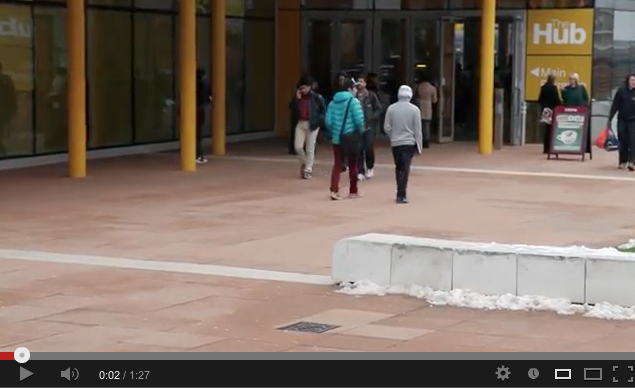
Editing in Premiere
Editing in Premiere at the beginning was really challenging for me because I got frustrated with it but after a few trial and errors I got the hang of it. The first video I ever made was one I made in lesson of Coventry University’s, The Hub building just as a guide and to get me used to the software. After this I tried to make another video of a Photoshop tutorial where I created a video straight from my Mac screen by using QuickTime Player and recording the screen. I wanted to test out some footage.
Photoshop Tutorial:
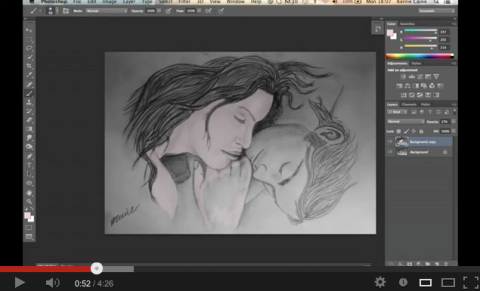
Using QuickTime Player, I recorded the screen so that it would show what I was doing on Photoshop to colour the sketch. After I had finished in Photoshop I saved the recording and then placed it into Premiere. This video was originally around 20 minutes long but I changed the speed so that it would fit into a small video. I then put music over the top of this, but I wanted to find a song that would fit exactly for the time. When I eventually found a song, I was able to drag it to the audio side of the video and export the video to create this. It was really easy to film and make this video and it was also good practice for me.
Portraiture Sketch:
This video was my next trial, and I actually used the Canon 5D to record part of the drawing. My initial idea was to record the whole drawing process but as I did this I didn’t realise that there wouldn’t be sufficient memory on the card. This video combines two separate clips of the drawing, which show progression. The clips were speeded up so that it wasn’t so boring and a fast paced song was added over the top to get a similar feeling. I added in beginning and end screens made from Photoshop files. These were to introduce and finish the video. I also added in a photo of the finished product to complete the storyline of this video. By using the Canon this time, it gave me a good understanding of how to make a video and using Premiere was made so much simpler.
By making these trial videos, it helped me get feedback on what to do next. I gained many likes and views to my videos on Youtube so they must have been good enough, but I also got comments where I should add more angles and split up the drawing scenes with parts that people don’t bother with. So I have taken this advice onboard with trying to figure out how to start off my video.
The Importance of Storyboarding
We have been asked to look at a film of our choice, and choose a scene to determine the key storyboard sections within a single scene. For this, I have chosen the film ‘Hachi: A Dog’s Tale’. We must use 10 screenshots to determine a 3 minute scene. I have chosen this film because it is one of my all time favourite films.
I have looked at the beginning scene where we are introduced to the loveable dog who is the star of the film. The beginning is a young boy talking about his hero, who is the dog called Hachi. This scene explores where Hachi came from and how he travelled from place to place and got lost.


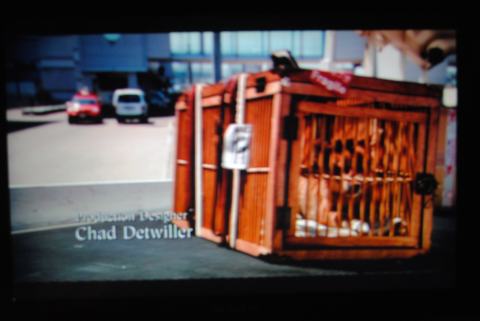


This taught me that storyboarding is very important when creating a film because it has to have a beginning, middle and end to be able to understand that storyline. The different shots and angles used for this make the video more interesting to watch. If continuous shots were used to explain that the dog was going from one place to another, the film would be too long. Whereas the snaps of footage put together create a quick way to show a story. The beginning and end image to this short 3 minute introduction starts and finishes on a similar screen of the boy in his classroom telling the story of how the dog came about. I think this is an effective way to create a storyline.
Storyboard of Video
After deciding on what I wanted to do for my video, I went away and did a draft of some storyboards I can use to guide me and my recording. This helped me to visualise how I was going to set up my camera and surrounding areas. I had in my head that I wanted to do all the recording myself if I could, but if I need assistance, it would be very minimal. Adding in different angles, set ups, close up and over view to get a good sense of the atmosphere of drawing, and to show off the drawing. Storyboarding was a lot harder to do than I thought it would be when you have no footage but it made it a lot clearer to work from. I thought the storyboarding would be a lot easier, because from the previous task of creating 10 screenshots of a 3 minute clip from a film was pretty simple I found.


Putting My Video Together
After doing a rough sketch of a storyboard, I started to record some footage so I decided on a drawing that I wanted to do from start to finish. I decided to do my video in sections so that I could make sure it didn’t seem boring so I aimed to make my video between 3-4 minutes long but have the footage speeded up so that people don’t get bored of one section. I also wanted to find music to fit with this but I found this so difficult at first so I just tested out many different variations of musical pieces which varied from movie soundtracks to piano pieces that I found. I came across a piece of music called ‘The Lotus Flower’ which was very relaxing but had a quick pace to it which I liked so I tried trial videos with that song.
After doing this, I found that this song worked great with the video. It took me so long to find a song that fitted well with the drawing. I looked through many different youtube videos of acoustic songs and piano pieces. I came across a piano piece called ‘The Lotus Flower’ which I think is beautiful, so I used this track for my music.I placed the soundtrack into Premiere and set up the video clips to change with the beat when it was needed so that it flowed with the music. After a few trial and error videos, and feedback from people I managed to finish my video
Digital Storyboard of Finished Video


Overall Evaluation
When I was first given this task, I thought it would be amazing to be able to do some filming as I had done very minimal amount of recording in college and it was interesting. However, as we got into it, I realized there was a lot more to it than just recording something. You have to get the settings correct, especially when using the Canon 5D’s, which I was completely new too. I think I took well to using the equipment such as the Canon’s and Edirols.
The themes that we got given for this assignment really stumped me; I just thought to myself ‘how am I going to show that in a film’. So, my initial thought was to go out and create mind maps. When I first saw the word ‘obsession’ I knew instantly that I wanted to do something to do with music. But as my ideas flowed from one to another, I decided that it was more appropriate to do hobbies because everyone has a hobby, and no one is the same. I chose the hobby of drawing, as this is what I like to do when I’m at University and I have some spare time to create some personal work.
After doing so many trials, and having to record on my own, I managed to put a piece together that I really enjoyed doing and feel that the final outcome has put my point across very well. Even though there is no audio to ‘explain’ the interest in drawing, you can clearly see that I enjoy it because of the great outcome.
If I was to do this project again, I would definitely try adding in some audio and using different transitions to chop it up a bit. This would make me learn more about the Premiere software. The research helped me greatly with this project so I don’t feel I did badly on that part but there is always room for improvement.
To me, this project has been extremely successful, as I have managed to create a video I am pleased with. Having started out thinking it was easy, and having to deal with the stress of software failure, having to re-shoot and managed my time well to make sure the video was completed.